Setting Up Status Pages
TL;DR
A status page gives users a single URL to check whether your service is up during an incident - reducing support tickets and building trust through transparency. PingPing automatically updates your status page from monitoring data the moment a 30-second check detects downtime, with no manual intervention needed.
What is a Status Page?
When GitHub goes down, developers don’t email GitHub support. They check githubstatus.com. That’s what a status page does: it gives your users a single URL where they can see whether your service is working, what’s broken, and what you’re doing about it.
A good status page shows more than a green checkmark. It breaks down individual components (API, dashboard, webhooks), displays uptime history over the past 90 days, and logs incidents with timestamps and resolution details. Users who can see this information trust your service more, even after an outage, because they can verify that you handled it well.
At PingPing, your status page updates automatically from your monitoring data. When a 30-second check detects downtime, the status page reflects it immediately without any manual intervention.
Why You Need a Status Page
The alternative to a status page is silence during outages, which forces users to guess whether the problem is on your end or theirs. That guessing turns into support tickets, social media complaints, and lost trust, even after you’ve fixed the actual problem.
A live status page does three jobs: it pre-empts support load by answering the “is it just me?” question, it logs incidents publicly so customers can verify you handled the problem well, and it gives you a single place to drop authoritative updates during an incident instead of repeating yourself in five channels.
Essential Status Page Components
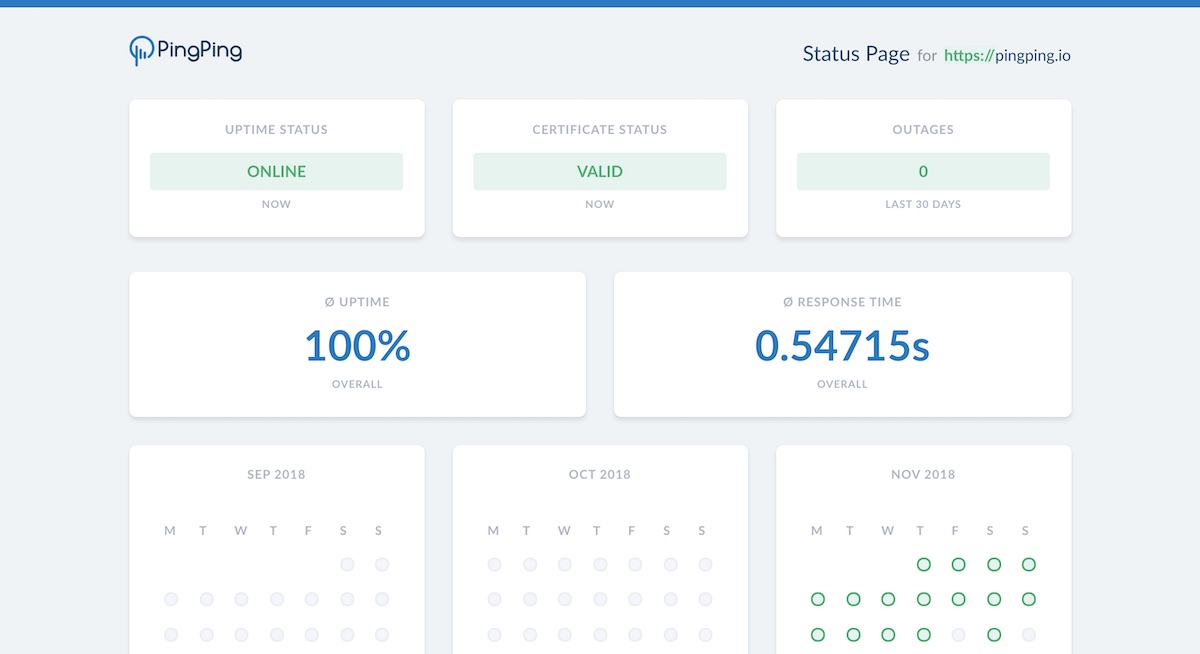
A good status page surfaces four things at a glance: current overall status, status of each component you operate (API, dashboard, webhooks), an incident history with timestamps, and uptime over a rolling 30 or 90 day window. The SSL certificate status often gets its own indicator because users don’t always read browser warnings as a separate problem from “the site is down.”
To see how leading companies implement these elements, check out our status page examples and best practices.
Setting Up Your PingPing Status Page
Creating a status page with PingPing is straightforward. For each website you monitor for uptime, a private status page is created automatically. You can publish the status page and configure a custom domain name for it, such as status.yourdomain.com.
You can also add a public status page to your website by adding a link to your status page in the footer and adding it to your support documentation.
Unlike tools where status pages are a separate add-on or a higher-tier feature, PingPing bundles status pages on every plan from €6/mo, with custom domains and no “powered by” footer. See how PingPing compares to Better Stack on bundling status pages versus paying extra for them.

Managing Incidents
How you communicate during an incident matters as much as how fast you fix it. When an incident occurs, follow these steps:
- Acknowledge the issue promptly
- Provide clear initial communication
- Update status regularly
- Document resolution steps
- Post incident summaries

Scheduled Maintenance Communication
Planned maintenance is an opportunity to build trust instead of erode it. The pattern that works: announce 7 to 14 days out with a specific window and expected impact, send a 24 hour reminder, post at start and completion, and add a brief retrospective the next day if anything went sideways. People will tolerate a 2 hour maintenance window if they know about it in advance and you stick to the time you committed to.

Integrating Status Pages
Link to your status page from your website footer and your support documentation. A status page nobody can find is a status page nobody uses.

Related guides
What is uptime monitoring?
How 30-second checks catch outages before your users do.
Status page examples and best practices
Real-world examples of effective status pages and the patterns that make them work.
What is SSL certificate monitoring?
How automated certificate checks keep your status page and your users secure.